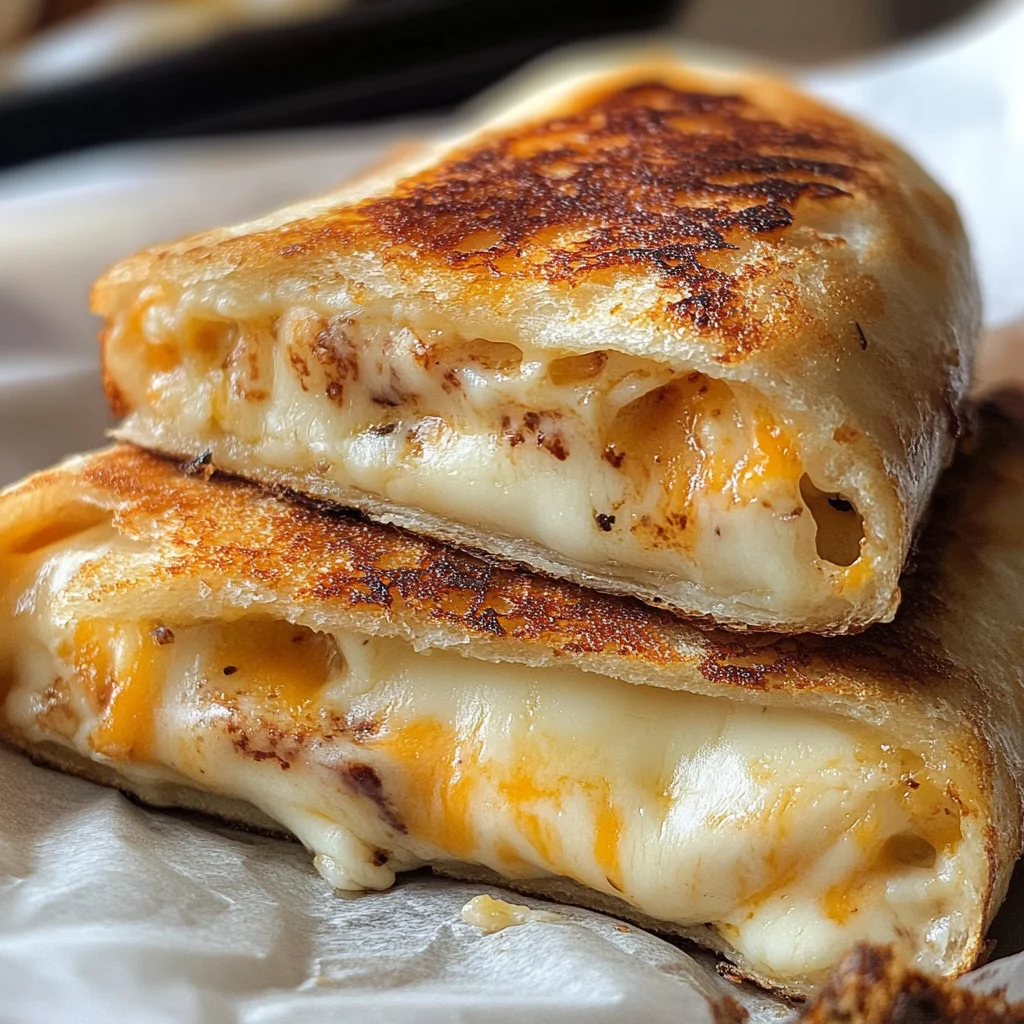
If you’re looking for a delightful and easy snack that the whole family will love, you’ve come to the right place! Back-to-school grilled cheese roll-ups are not just a meal; they’re an experience. This recipe combines cheesy goodness with the fun of rolling up soft bread, creating crispy bites that kids and adults will enjoy alike. Whether you need something quick for busy weeknights or a tasty treat for gatherings, these roll-ups are sure to please.
What makes this recipe truly special is its versatility. You can customize it with your favorite fillings, making it a great option for picky eaters or those who love to experiment in the kitchen. Serve them warm with marinara sauce or ketchup for dipping, and watch as smiles light up around the table!
Why You’ll Love This Recipe
- Quick to prepare: With just 15 minutes of prep time, you can whip these up in no time!
- Family-approved: Kids adore these cheesy bites, making them perfect for lunchboxes or after-school snacks.
- Customizable: Add your choice of fillings to make each roll-up unique and suited to your taste.
- Make-ahead friendly: Prepare them in advance and warm them up when you’re ready to eat!
- Deliciously satisfying: The combination of gooey cheese and crispy bread will leave everyone wanting more.
Ingredients You’ll Need
This recipe uses simple, wholesome ingredients that you probably already have on hand. Let’s gather everything we need to create these delicious back-to-school grilled cheese roll-ups!
- 8 slices soft bread (white or whole wheat)
- 2 cups shredded cheddar cheese
- 1 cup shredded mozzarella cheese
- 4 tablespoons butter
- Optional fillings: turkey pepperoni, spinach, bacon bits
Variations
Feel free to get creative with this recipe! The beauty of back-to-school grilled cheese roll-ups is their flexibility. Here are some fun ideas to switch things up:
- Swap the cheeses: Try using pepper jack or gouda for an extra kick of flavor.
- Add veggies: Spinach or roasted peppers can add nutrition and color.
- Change the protein: Substitute turkey pepperoni with cooked chicken or even plant-based options for variety.
- Mix in spices: A sprinkle of garlic powder or Italian herbs can elevate the taste even further.
How to Make Back-to-school Grilled Cheese Roll-Ups
Step 1: Flatten the Bread
Start by flattening each slice of bread using a rolling pin until it’s about 1/4 inch thick. This step is crucial because it helps create a perfect canvas for your cheesy filling while ensuring they roll up nicely without tearing.
Step 2: Add the Cheese
Sprinkle a generous amount of cheddar and mozzarella cheese over each slice. If you’re adding any optional fillings like turkey pepperoni or spinach, now’s the time! Layering on the flavors will make every bite delicious.
Step 3: Roll It Up
Carefully roll each slice tightly around the cheese filling, making sure there are no gaps. This helps keep all that melty goodness inside while cooking!
Step 4: Cook in Butter
Melt butter in a skillet over medium heat. Once melted, coat each roll-up in butter before placing them seam-side down in the skillet. Cooking them this way gives them that golden-brown crispiness we all love.
Step 5: Brown Each Side
Cook each roll-up for about 3-4 minutes on each side until they are golden brown and crispy. Keep an eye on them—this is where they transform from soft rolls into delicious bites!
Step 6: Serve Warm
Once cooked, serve these delightful roll-ups warm alongside marinara sauce or ketchup for dipping. Watching everyone enjoy their tasty creations will be the cherry on top of your cooking adventure!
Pro Tips for Making Back-to-school Grilled Cheese Roll-Ups
With just a few simple tweaks, you can elevate your grilled cheese roll-ups from ordinary to extraordinary!
- Use fresh bread: Fresh bread rolls up more easily and results in a better texture. Stale bread may tear or not hold the filling as well.
- Mix your cheeses: Combining different types of cheese, like cheddar and mozzarella, enhances the flavor and gives you a delightful melty texture that kids will love.
- Don’t skip the butter: Coating the roll-ups in melted butter before frying ensures they get that beautifully golden color and extra crunch, making them irresistible!
- Experiment with fillings: Adding ingredients like turkey pepperoni or spinach not only boosts flavor but also adds nutrition, making these roll-ups a more balanced snack.
- Serve immediately: These roll-ups are best enjoyed fresh out of the skillet when they’re warm and crispy. If you’re packing them for lunch, consider reheating briefly in a toaster oven for maximum crispiness.
How to Serve Back-to-school Grilled Cheese Roll-Ups
Serving these delicious roll-ups is all about presentation and pairing them with complementary flavors. Here are some fun ideas to make your meal shine!
Garnishes
- Fresh herbs: Chopped parsley or basil can add a burst of color and freshness on top of your roll-ups.
- Parmesan sprinkle: A light dusting of grated Parmesan cheese on top can enhance the flavor profile and make it look restaurant-worthy.
Side Dishes
- Veggie sticks: Pair crunchy carrot, cucumber, or bell pepper sticks for a refreshing contrast to the warm roll-ups. They’re easy to prepare and provide an extra dose of vitamins!
- Fruit salad: A colorful mix of seasonal fruits offers a sweet balance to the savory roll-ups. It’s nutritious and adds brightness to your plate.
- Tomato soup: This classic pairing is perfect for dipping! A warm bowl of tomato soup complements the cheesy goodness while adding comfort to your meal.
- Sweet potato fries: Baked sweet potato fries are not only delicious but also packed with nutrients. Their sweetness pairs wonderfully with the salty cheese rolls.
With these tips and serving suggestions, your back-to-school grilled cheese roll-ups will be a hit at lunch or snack time! Enjoy every bite!

Make Ahead and Storage
These Back-to-school Grilled Cheese Roll-Ups are not only delicious but also perfect for meal prep! You can make them ahead of time, ensuring you always have a tasty snack or lunch option ready to go.
Storing Leftovers
- Allow the roll-ups to cool completely before storing.
- Place them in an airtight container.
- Store in the refrigerator for up to three days.
Freezing
- Prepare the roll-ups as directed but do not cook them.
- Place uncooked roll-ups on a baking sheet in a single layer and freeze until solid.
- Transfer the frozen roll-ups to an airtight freezer bag; they can be frozen for up to two months.
Reheating
- For refrigerated roll-ups, reheat in a toaster oven at 350°F (175°C) for about 10 minutes until heated through and crispy.
- For frozen roll-ups, cook from frozen in a skillet over medium heat for about 12-15 minutes or until golden brown, turning occasionally.
FAQs
Got questions? Here are some common inquiries about Back-to-school Grilled Cheese Roll-Ups answered just for you!
Can I customize my Back-to-school Grilled Cheese Roll-Ups?
Absolutely! Feel free to experiment with different cheese combinations like pepper jack or gouda. Adding vegetables such as spinach or roasted peppers can enhance flavor and nutrition too!
How do I store leftover Back-to-school Grilled Cheese Roll-Ups?
To store leftovers, let them cool completely, then place them in an airtight container. They will stay fresh in the refrigerator for up to three days.
What dipping sauces go well with Back-to-school Grilled Cheese Roll-Ups?
These delightful roll-ups pair perfectly with marinara sauce or ketchup. You could also try ranch dressing or a homemade garlic aioli for extra flavor!
Can I make these roll-ups ahead of time?
Yes! You can prepare the roll-ups ahead of time and store them in the fridge or freezer. Just reheat them when you’re ready to enjoy!
Final Thoughts
I hope you’re excited to try making these Back-to-school Grilled Cheese Roll-Ups! They’re not only fun and tasty but also versatile enough to please everyone’s palate. Whether it’s for lunchboxes or after-school snacks, these cheesy delights are sure to be a hit. Enjoy making them, and don’t forget to get creative with your fillings!
Back-to-school Grilled Cheese Roll-Ups

Back-to-school Grilled Cheese Roll-Ups are the perfect family-friendly snack that combines cheesy goodness with a fun twist. These delightful roll-ups are quick to prepare, making them an ideal solution for busy weeknights or packed lunchboxes. With a crispy outer layer and gooey cheese center, they are sure to put smiles on everyone’s faces. The best part? You can customize the fillings to cater to everyone’s tastes, from classic cheese to veggie-packed options, ensuring each bite is deliciously satisfying. Serve them warm with marinara sauce or ketchup for dipping, and you have a hit snack that will please both kids and adults alike!
- Prep Time: 15 minutes
- Cook Time: 10 minutes
- Total Time: 25 minutes
- Yield: Makes approximately 8 roll-ups 1x
- Category: Snack
- Method: Frying
- Cuisine: American
Ingredients
- 8 slices soft bread (white or whole wheat)
- 2 cups shredded cheddar cheese
- 1 cup shredded mozzarella cheese
- 4 tablespoons butter
- Optional fillings: cooked chicken, spinach, turkey pepperoni
Instructions
- Flatten each slice of bread with a rolling pin until about 1/4 inch thick.
- Evenly sprinkle cheddar and mozzarella cheese on each slice; add any optional fillings.
- Roll each slice tightly around the filling without gaps.
- Melt butter in a skillet over medium heat; coat each roll-up in butter before placing seam-side down in the skillet.
- Cook for 3-4 minutes on each side until golden brown and crispy.
- Serve warm with marinara sauce or ketchup for dipping.
Nutrition
- Serving Size: 1 roll-up
- Calories: 210
- Sugar: 2g
- Sodium: 320mg
- Fat: 12g
- Saturated Fat: 7g
- Unsaturated Fat: 4g
- Trans Fat: 0g
- Carbohydrates: 20g
- Fiber: 1g
- Protein: 8g
- Cholesterol: 30mg



Leave a Comment